Monday, May 30, 2011

2 Year Old Birthday

Hello,
I am back with a card, just because. I am so busy right now in my day to day life and with my designs for my challenge teams that its so nice every now and then to post a card that doesn't follow a sketch or colour scheme. Don't get me wrong, I love my design team work and being challenged to work with a sketch or a colour combo that's out of my comfort zone as this keeps me on the ball, trying to perfect each card, but I had so much fun with this one. It's my little nephew's 2nd birthday on Sunday, so I wanted to create a bright and fun card for him as he is such a happy little boy.


My card features the balloons from the Up, Up and Away set from Papertrey Ink. I got the idea for the 3D balloons from Betsy Veldman's card here. I stamped the balloon three times for each one, using Certainly Celery, Pumpkin Pie, Tempting Turquoise and So Saffron inks. I then also stamped the basket 3 times in So Saffron ink and then adhered them to the card front. Behind the balloons, I have placed two die cut clouds which have been heat set with glitter. The sentiment also from the same set has been stamped in Tempting Turquoise ink.

On the inside of the card, I stamped the clouds in So Saffron ink and then die cut a cloud and stamped my sentiment from Birthday Basics in Certainly Celery ink. The colour scheme for my card was inspired by this Transportation paper from Best Creation Inc, so I punched some circles out with my 1 1/4 inch punch and adhered along the bottom.

This card is really more clean and simple than my usual style, but I am quite happy with the result. It was so much fun to make and I really hope little Liam likes it!

Back soon with a new Colour Create challenge,


Supplies
Stamps: Up, Up and Away, Birthday Basics (PTI)
Cardstock: Stampers Select White (PTI); Transportation DP (Best Creations Inc)
Ink: So Saffron, Certainly Celery, Tempting Turquoise, Pumpkin Pie (SU)
Accessories: Cloud Die set (PTI); Dazzling Diamonds glitter, Heat and Stick Powder, 1 1/4" circle punch (SU); scor tape

Friday, May 27, 2011

CSAYL Challenge - Use A Die

Hello,
This week's challenge over at CSAYL is to use a die cut as part of your main image. The winner of this week's challenge will have the opportunity to be a guest designer for a week in June.
For my card I added a layer of Cosmo Cricket DeLovely paper to a base of Kraft card.  I then die cut two clouds from my white layer and then added some more white cardstock behind the space left from my cloud diecuts. This extra piece had been run through my Cuttlebug with my Swiss Dots embossing folder and sprinkled with glitter and heat set.


I stamped my girl from Pure Innocence: Presents For You set in Tuxedo Black ink and coloured her with Copics and then paper pieced the coat and hat with more of the DeLovely paper. I stamped my sentiment from Holiday Button Bits in Tuxedo Black ink also. To create the grass, I used my MFT's grass die and then coloured the tips with a white gel pen and added some clear kindy glitz to make it look like snow. I used the same kindy glitz to add snow falling as well.

On the inside I inked up just the presents from the same Pure Innocence set, avoiding inking where the girl's hand is. I then used a black pen to hand draw the rest of the presents that weren't inked up. I die cut more grass and covered it in kindyglitz and added more snow on either side. The sentiment is also from Holiday Button Bits.

The rest of the team have created some lovely cards, so check out their creations over at the CSAYL blog and link up your entry while you're there!!

Supplies
Stamps: Pure Innocence: Presents For You (MFT); Holiday Button Bits (PTI)
Cardstock: Kraft, Whisper White, Certainly Celery (SU); DeLovely paper (Cosmo Cricket)
Ink: Tuxedo Black (Memento)
Accessories: Cloud Die (PTI); Grass Die (MFT); Swiss Dots embossing folder; clear kindyglitz; copic markers; white gel pen (Signo); Dazzling Diamonds glitter, Heat and Stick Powder (SU)

AnnaBelle Stamps Bling Sketch Challenge # ABSC038

absc038
It's that time of the month again - time for AnnaBelle Stamps Bling Sketch Challenge ABSC038. For this month's sketch I was absolutely stumped, but decided to flip the sketch to get it to work for me.


I used the new Backgrounds By Design 4 set for my main strip, stamping the star background strip repeatedly in Baja Breeze ink. I then added some chocolate cardstock behind it and another scalloped strip along the bottom. Some waterfall sprinkles were added for my bling. I stamped the sentiment from Mother's Day Bouquet in chocolate ink, and rounded the corners of this little strip before adhering it behind the scalloped layer. This was then all added to some Thift Shop DP and mounted on a white card base. This card was made for my nephew turning 6, so I punched a star from Baja Breeze card and adhered an American Craft Thicker for the 6. Two of the corners were also rounded with the corner rounder punch.


I decided to make the inside of the card a spiral pop up design, so I punched a 1 1/4" circle and cut a spiral shape, adhering the ends to the centre of the card. I then punched out some stars from different cardstock and finished with a large star which was stamped using the Background By Designs star strip. The inside layer is from So Saffron cardstock and I stamped a border along the top and bottom using the star strip and Versamark ink. Finally, I stamped the sentiment from Acacia in chocolate ink.

Check out all the other designer's cards:
Patti
and our guest designer this month
Janet O'Brien
How To Play Along : 
- We post our challenges every Friday at 12:00pm AEST (AEDT during Daylight Savings).
- Our Sketch Challenge Runs from the last Friday of a month through till the last Friday of the following month.
- Each Friday in between we have themed challenges. To be eligible for the monthly prize of a $20 gift voucher to spend in store at AnnaBelle Stamps you MUST take part in the sketch challenge AND one of the weekly challenges.
- Please link directly to your entry not just to your blog.
- Include a link back to this blog in your post.
- Please don't link to postings made prior to the date of our current challenge.  All projects submitted must be new.
- A maximum of 5 challenges may be combined including this one.        
- You may enter any challenge several times as long as each submission is with a new creation.
- We would love you to use AnnaBelle Stamps, but you can play along without them. For those who use AnnaBelle stamps and upload to the Gallery HERE then you will also be in the running to be our Monthly Guest Designer!

Supplies
Stamps: Backgrounds By Design 4, Acacia, Mother's Day Bouquet (AnnaBelle Stamps)
Cardstock: Stampers Select White (PTI); Chocolate Chip, Baja Breeze, So Saffron (SU); Thrift Shop DP (October Afternoon)
Ink: Chocolate Chip, Baja Breeze, Versamark (SU)
Accessories: 6mm Waterfall Sprinkles (AnnaBelle Stamps); Star Punch, Scallop Border Punch, 1 1/4" circle punch(SU); corner rounder punch; small star punch; American Craft thicker

Friday, May 20, 2011

CSAYL - Very Vintage

CSAYL's challenge this week is Very Vintage - so use your distress inks to make your card look old. I have to admit that Vintage is so far out of my comfort zone its not funny. Don't get me wrong, I love the look of vintage cards with everything placed randomly, yet perfectly, however with my addiction to clean lines, I find this look very hard to pull off! Anyway onto the challenge - this week the prize for the winning entry is a Guest spot on the DT for one week in June, so make sure you add your entry over at the CSAYL blog!

Here is my take on the challenge:
I chose to use the set - A Rhonna Christmas by Autumn Leaves. Its one of the very first sets I ever purchased online and I still love it to this day. I have listed the steps I used to create my card below:

1. Cut Very Vanilla cardstock for base and score in half. Add a thin layer of glitter around the edge.
2. Cut another Vanilla layer for front and run this through Cuttlebug with Fleur De Lis Impressability. Ink the edges with Chamomile Tea Dye ink.
3. Cut a strip of Scarlet Jewel cardstock and punch a scalloped border.
4. Stamp a pattern on a thin strip of Vanilla cardstock using Kraft ink and Botanicals background set and adhere to Scarlet Jewel strip.
5. Stamp music background on Sweet Blush strip in Pink Pirouhette ink and adhere to Scarlet Jewel strip.
6. Tie seam binding around Scarlet Jewel strip and attach a Scarlet Jewel button with twine. Adhere Scarlet Jewel layer to card frount.
7. Run a piece of  Sweet Blush cardstock through Cuttlebug with Mat Stack 1 die.
8. Stamp Mat Stack outline image on Vanilla card with Kraft ink. Cut along the border and adhere this to the Sweet Blush diecut.
9. Stamp Happy Holidays in Kraft ink using A Rhonna Christmas set onto the Vanilla layer.
10. Stamp the Happy Holidays image again in Scarlet Jewel ink and cut out bird, covering it with glitter and adhere die cuts with bird attached to card front.
For the inside I just stamped Season's Greetings from A Rhonna Chrismas in Kraft ink on a layer of Vanilla card and attach to inside of card.

After all the difficulty trying to make my card look as vintage as I could, I really enjoyed this challenge in the end. Why not pop on over to the CSAYL blog, check out the other team designs and add your card for a chance to win a guest DT spot!!
Happy stamping!!

Supplies
Stamps: A Rhonna Christmas (Autumn Leaves); Mat Stack 1 Collection, Background Basics: Botanicals (PTI); music background stamp set (unknown)
Cardstock: Very Vanilla (SU); Sweet Blush, Scarlet Jewel (PTI)
Ink: Kraft, Pink Pirouhette (SU); Scarlet Jewel, Chamomile Tea Dye ink (PTI)
Accessories: Vanilla Bean seam binding (My Craft Spot); Scarlet Jewel button, Mat Stack 1 die (PTI); Fleur De Lis Impressability (Spellbinders); scallop border punch, twine, Dazzling Diamonds glitter (SU)

Say It With ..... Teardrop Pearls!

Say_It_With_tear_drop_pearls
Hello!
This week's challenge over on the AnnaBelle Stamps blog is to use teardrop pearls on your project. Oh my - it took me a week of thinking and then a night of throwing out heaps of ideas until I came up with this simple, but hopefully effective card.

I used Kraft for my base and then added a layer of some retired DP. I then used one of my new fave sets -Daisy Delight to stamp my flowers in Baja Breeze and Riding Hood Red ink. I hand drew my stems joining the flowers to create a bouquet. A lightbulb moment, led me to using my teardrop pearls as petals for my stems. I love the way this turned out! The sentiment is from the new Acacia set stamped in Old Olive ink.
On the inside I kept my card simple as well, stamping another sentiment from Acacia and adding one more flower with stem and teardrop pearls.

How To Play Along : 
- We post our challenges every Friday at 12:00pm AEST (AEDT during Daylight Savings).
- Our Sketch Challenge Runs from the last Friday of a month through till the last Friday of the following month.
- Each Friday in between we have themed challenges. To be eligible for the monthly prize of a $20 gift voucher to spend in store at AnnaBelle Stamps you MUST take part in the sketch challenge AND one of the weekly challenges.
- Please link directly to your entry not just to your blog.
- Include a link back to this blog in your post.
- Please don't link to postings made prior to the date of our current challenge.  All projects submitted must be new.
- A maximum of 5 challenges may be combined including this one.        
- You may enter any challenge several times as long as each submission is with a new creation.
- We would love you to use AnnaBelle Stamps, but you can play along without them. For those who use AnnaBelle stamps and upload to the Gallery HERE then you will also be in the running to be our Monthly Guest Designer!

Check out the lovely designs from the rest of the team who are listed on my sidebar.

Back soon!


Supplies
Stamps: Daisy Delight, Acacia (AnnaBelle Stamps)
Cardstock: Kraft, Very Vanilla, Riding Hood Red DP (SU)
Ink: Old Olive, Riding Hood Red, Baja Breeze (SU)
Accessories: Teardrop Pearls (AnnaBelle Stamps)

Wednesday, May 18, 2011

Colour Create Challenge #71

***This post is a day early!! The Colour Create Challege actually starts Thursday - sorry I have got my days mixed up!!!!***
Hello faithful readers!! Its time for another fortnightly Colour Create challenge and Sylvia has picked some lovely colours for us this time:
19 May - Challenge 71 - Sylvia
The challenge is to use white, cream and brown with optional extras of one more colour, flowers and buttons. The sponsor this week is: 
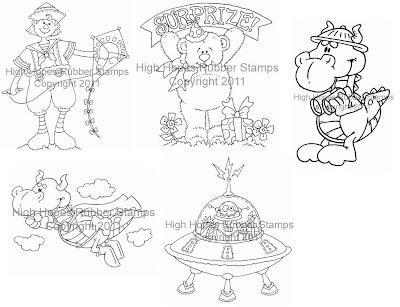
and the winner of this week's challenge will win these 5 digis:
Here is my take on the challenge:
I started with a cream base  and then added a mat layer from Plum Pudding cardstock. For my main cream layer I tried Papertrey Ink's Make It Monday Challenge #13 which focuses on tricks with Impression Plates. I ran my layer through my Cuttlebug with my Linen impression plate, adding my Mat Stack 1 Die to emboss a panel in the centre. I used Crumb Cake ink to stamp my main image from Round and Round (PTI's anniversary set from last year). The bird was then stamped with Plum Pudding ink inside the circle. I also stamped two flourishes from Fancy Flourishes in Crumb Cake ink, adding some smaller flowers from Beautiful Blooms ll in Plum Pudding ink. To add white to my card, I added some random pearls across the card front.  The sentiment is also from Round and Round, stamped in Crumb Cake ink and cut into a banner.

Before adhering this layer to the plum layer, I punched two small holes either side of the Mat Stack embossed panel and threaded through some Kraft taffeta ribbon. To keep this attached, I ran over each side with my sewing machine. Finally I inked all the edges with Chamomile ink and attached this layer to the card front.
The inside follows the same theme as the front with a sentiment added from Inside and Out: Birthday.

The rest of the team has created some lovely cards with these colours, so have a look over at the Colour Create blog and add your creation there at the same time - you have a fortnight to enter!

Thanks for visiting!

Supplies
Stamps: Round and Round anniversary set, Inside and Out: Birthday, Beautiful Blooms ll, Fancy Flourishes (PTI)
Cardstock: Very Vanilla (SU); Plum Pudding, Chamomile Tea Dye ink (PTI)
Ink: Crumb Cake (SU); Plum Pudding (PTI)
Accessories: Linen impression Plate, Mat Stack 1 Die (PTI); white pearls (Kaisercraft); Cropadile, Kraft ribbon (SU), thread

Tuesday, May 17, 2011

AnnaBelle Stamps Blog Hop!

blog_hop_again
AnnaBelle Stamps Blog Hop
Come and join us the 1st and 3rd Tuesday of every month as we have fun sharing a new set with you!  
Play along with us for your chance to win the Blog Hop set OR the detailed prize!
How to Play :
Playing along is now even easier!  You can leave a comment on one or all of the DT blogs and add your name using the Inlinkz tool which can be found on any of the DT blogs.
Each Hop a random winner will be drawn and if you've commented on the mystery DT blog then you will be the winner of the Blog Hop prize!   The hop will run for 1 week and the winner will be announced the following Tuesday!
So even if you only comment on one blog you may be lucky enough to have chosen the mystery DT blog to comment on, and still be in with a chance to win! 

The prize this week is the Daisy Delights set and some die cut shapes to match the flowers and leaves. There is also a special for this week - purchase both the Daisy Delight and Daisy Delight Silhouette for a special price of $19.95!

If you have hopped over from Patti's blog then you are on the right track! If not, then start over at the AnnaBelle Stamps blog to begin your hop and check out all the great designs. Today we are focusing on sets Daisy Delight:
lbs008
Let me tell you - these sets are fabulous!! Either one of them is great on its own with soooo many possibilities, but the beauty of these is that they can be paired together easily too, which is what I have done with my card today.
These are the steps on how I created my card front:
1. Create card base 5 3/8" by 5 3/8" square from grey cardstock.
2. Cut a white layer 5 1/4" by 5 1/4 " square and score a line around the outside 1/2" all the way around.
3. Wrap some pink striped AnnaBelle Stamps ribbon around the centre , adhering behind the white layer, then add this layer to the card base.
4. Stamp Daisy Delight Silhouette stamp on white cardstock in grey ink and trim around the edge. Adhere this layer to grey cardstock cut 4" by 4".
5. Using Daisy Delight set, stamp two of the small flowers and one of the medium flowers on vellum in pink ink and cut out once ink has dried. (When cutting, cut the petals close to the flower centre so they can be lightly bent up to give dimension).
6.Randomly place these on matching silhouette flowers and adhere with pink brads. Trim any petals off that go beyond the silhouette stamp.
7. Adhere the small square flower panel to card front with foam dimensional tape.
8. Stamp 'Thinking of You' sentiment from the Acacia set in grey ink onto a strip of white cardstock, trim into a banner and adhere in the bottom righthand corner of card.
Inside of card:
1. Cut a white square of cardstock 51/4" by 51/4" and score 1/2" in from the outside to make a border.
2. Stamp Get Well Soon sentiment from Acacia in grey ink  on white cardstock and mat this on a grey piece of card adhering to the centre.
3. Stamp the smallest flower from Daisy Delight in grey ink and pink ink and cut out, bending petals up slightly. Layer these in the corner and adhere the inside piece to card base.

Now be sure to add your comment to the inlinkz tool below for your chance to be in the draw for this fortnight's blog hop prize and then head on back to the AnnaBelle Stamps blog to finish! 
Good luck!!  

Supplies
Stamps: Daisy Delight, Daisy Delight Silhouette, Acacia (AnnaBelle Stamps)
Cardstock: Whisper White, Basic Grey (SU); vellum
Ink: Smokey Shadow (PTI); Melon Mambo (SU)
Accessories: pink brads; pink striped ribbon (AnnaBelle Stamps); Scor-Pal


Saturday, May 14, 2011

CSAYL Challenge - You've Got Me In Stitches

This week's CSAYL challenge is - You've Got Me In Stitches, so the requirement is to add some sewing to your cards. The sponsor this week is Sew Many Cards and their prize for the winner is 5 digis.
View SMC Blog.png in slide show
I used the image Hershey with Angel Owen for my card:

I won't go in to too much detail as this post is already late due to Blogger going down yesterday, but the papers used on my card are from October Afternoon's Thrift Shop collection and the seam binding is from My Craft Spot. I chose to hand cross stitch my card and also sponged in light blue ink around the edge of my image while still in a circle nestability.

I have checked out the other team members' cards and they are fantastic, so head on over to the CSAYL blog to have a look!!! Also enter your card for a chance to win this great prize!

Supplies
Stamps: Hershey with Angel Owen digi (Sew Many Cards); Holiday Button Bits (PTI)
Cardstock: Kraft, Stampers Select White (PTI); So Saffron, Chocolate Chip (SU); Thrift Shop Collection DP(October Afternoon)
Ink: Chocolate Chip (SU); Sea Lavender (Martha Stewart)
Accessories: Apron Lace border punch (Fiskars); tan thread; paper piercer; mat pack, dimensionals (SU); Tiny Tags die set (Cuttlebug); twine (AnnaBelle Stamps); Fleur De Lis Impressabilities, Circle Nestability (Spellbinders), Copic markers

Say It In Monochromatic colours

Say_it_in_mono
Today the weekly AnnaBelle Stamps challenge is to say it in monochromatic colours. Unfortunately, I think I may have interpreted this one incorrectly and used varying shades of different colours, rather than just working with neutrals. Sorry!!! Anyway I ended up making three different cards using this technique which is heaps of fun:


The set I have used for each of my cards is one of my faves - Ballerina Rose, just in varying shades. Each of the cards has a white base with a grey mat layer and then another white layer on which the image is stamped repeatedly. After stamping, I ran the top layer through my Cuttlebug with my linen impression plate, before stamping my sentiment and clear embossing it. A matching ribbon was tied around the bottom of each card and some butterflies punched out and added to the top corner. The first card uses different tones of pink:

The sentiment for this card is also from the Ballerina Rose set. Here's the inside:

For the inside I used the small individual flower, stamping it in all three tones, before cutting and adhering to the corners.

The second card uses various shades of green with a matching Certainly Celery ribbon. Again the sentiment is from Ballerina Rose.

The final card uses shades of red, orange and yellow - not exactly monochromatic, but I used this idea on last week's challenge and I just loved the colours together:

The sentiment on the front of this card is from Jasmine's Cupcake set and on the inside I have used a generic sentiment from Mother's Day Bouquet.

So there you go - this challenge was heaps of fun so be sure to hop on over to the AnnaBelle Stamps blog and see what the other designers have come up with. Make sure you link your creation as we would love to see what you create!!


Supplies
Stamps: Ballerina Rose, Mother's Day Bouquet, Jasmine's Cupcake (AnnaBelle Stamps)
Cardstock: Stampers Select White. Lemon Zest (PTI); Pink Pirouhette, Certainly Celery (SU)
Ink: Certainly Celery, Pink Pirouhette, Pretty In Pink, Melon Mambo, Pumpkin Pie, So Saffron, Riding Hood Red, Old Olive (SU); Smokey Shadow (PTI); New Sprout (Memento)
Accessories: Butterfly punch (Martha Stewart); Linen Impression Plate (PTI); Certainly Celery ribbon, Pretty In Pink ribbon, clear embossing powder (SU); orange dotted ribbon.

Friday, May 6, 2011

CSAYL- Make Us Laugh!


Over at the CSAYL blog, the challenge this week is to add a funny sentiment to your Christmas card and the sponsor this week is Pink Cat Studio:

View PCS_Spons...jpg in slide show
and the winner this week will receive 5 free digis of their choice. I chose to use Polar Bear Present for my card:

There was lots of sewing involved in this card to adhere all the layers together. I first started with my white base and then Kraft for my mat layer. On top of this I added two different strips of designer paper and some Pretty In Pink cardstock which was all machine stitched together. Before adhering my layers to the base, I tied some lace around the centre and added a Sweet Blush button to the bow with some pink striped baker's twine.

I printed the image and a free Pink Cat Studio sentiment onto some white cardstock and coloured in the hat and lightly inside the polar bear with copics (I used B0000 to add a little highlight inside the bear, so click the image to see this clearer). To add a little texture I added some sparkly fluff to the hat and pompom. Some silver rhinestones were added to finish it off.


On the inside I used a sentiment from Papertrey Ink's Holiday Button Bits set and then machine stitched the white layer to some more designer paper.

The girls on the design team have some lovely creations for this challenge, so be sure to have a look over at the  CSAYL blog and why not have a go at the challenge while you're there - its a great way to get ready for Christmas (and it will be here before we know it!

Supplies
Stamps: Polar Bear Present digi, sentiment digi (Pink Cat Studio); Holiday Button Bits (PTI)
Cardstock: Stampers Select White, Kraft (PTI); christmas DP - unknown (Kaisercraft)
Ink: Tuxedo Black (Memento)
Accessories: copics; sparkly fluff; silver rhinestones, lace (Kaisercraft); pink striped bakers twine (MFT); sweet blush button (PTI); thread